Two factor authentication adds a layer of security for your Gmail. Apart from entering your normal password, you will need to enter the random number generated either using the App on your Phone or via SMS/Voice Call option. The principle behind two authentication is that you will need two components to complete the authentication: What you know? Password :: What you have? Verification Code making it harder to hack into Google accounts. According to Google: “2-step verification is an advanced security feature for users who are concerned about account security and usually have a phone with them when they sign in. The feature will take you about 15 minutes to set up and you’ll need access to at least one phone — preferably two.”
So here is how you setup your Google account for two factor authentication (This works for Google Apps services as well):
1. On your Gmail account, click on Settings.
2. Click on ‘Accounts and Import’
3. Click on Other Google Account Settings. It will open a new page.
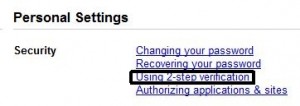
4. Under Personal Settings, Click on Using 2-factor Authentication

5. You will be prompted to sign-in again using your existing password.
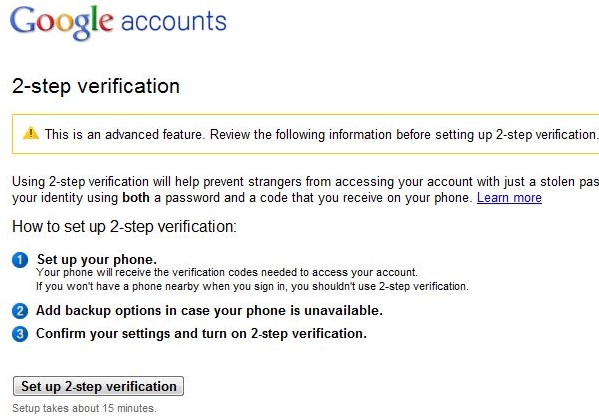
6. Once you sign in, the page looks as below. Click on 2-step verification:

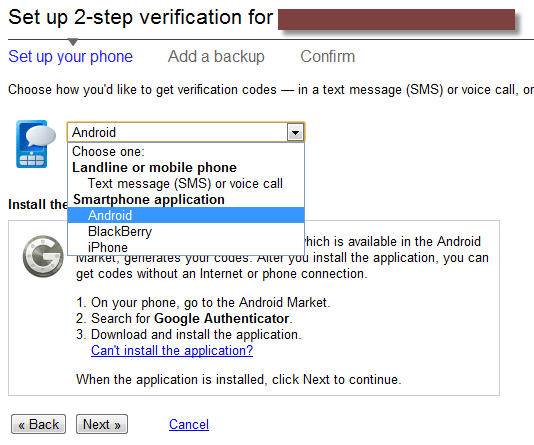
7. If you have an Android / iPhone / Blackberry, you can download the Google Authenticator app from the App Stores. For Android phone, Click here to download from Android market. If you do not own any of these smartphones, do not worry, you can still use the Text Message or Voice Call option to enable two factor authentication. This service works on Land phone as well (using voice callback option).

8. Once you install the Google Authenticator App, invoke the Scan Barcode option and you are ready to go.
9. If you select Text message (SMS) or Voice call, enter your mobile number in the text box. You will need to go ahead with the ‘Let’s test the phone’ for a test code to be sent to your phone and validate it in the code box. For Voice Call, you will receive a call and the verification code will be read to you.
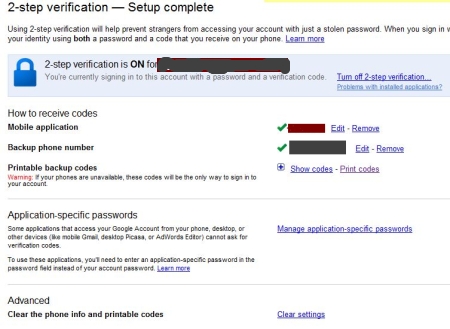
10. Once you are done testing the authentication codes, do not forget to add a backup/secondary telephone number and take the printouts of the backup/secondary codes. These are very essential just in case you are NOT able to generate the code using your primary phone either through app or using SMS.
11. Application-specific passwords – Well, the only flip side of having two factor authentication is that Google is yet to make this seamless across platforms. For example: for signing into my gmail app on mobile or using client like Outlook, Thunderbird etc I will need to have an Application-Specific password as 2 factor authentication is not yet compatible outside of browsers. Once you are done with setting up and enabling two factor authentication you will receive a confirmation email along with the link to setup Application-specific password.

Happy and Safe Googling 🙂
Related Article: How to Keep your Password Safe
2 thoughts on “How To Enable Two Factor Verification for Gmail”
Comments are closed.